Harbor 是一个开源的可信云原生注册项目,可以存储、标识和扫描内容。Harbor扩展了开源的Docker发行版,增加了用户通常需要的安全、身份和管理等功能。拥有一个更接近构建和运行环境的注册表,可以提高镜像传输效率。Harbor支持注册表之间的镜像复制,还提供了用户管理、访问控制和活动审计等高级安全功能。
架构
harbor 2.x架构
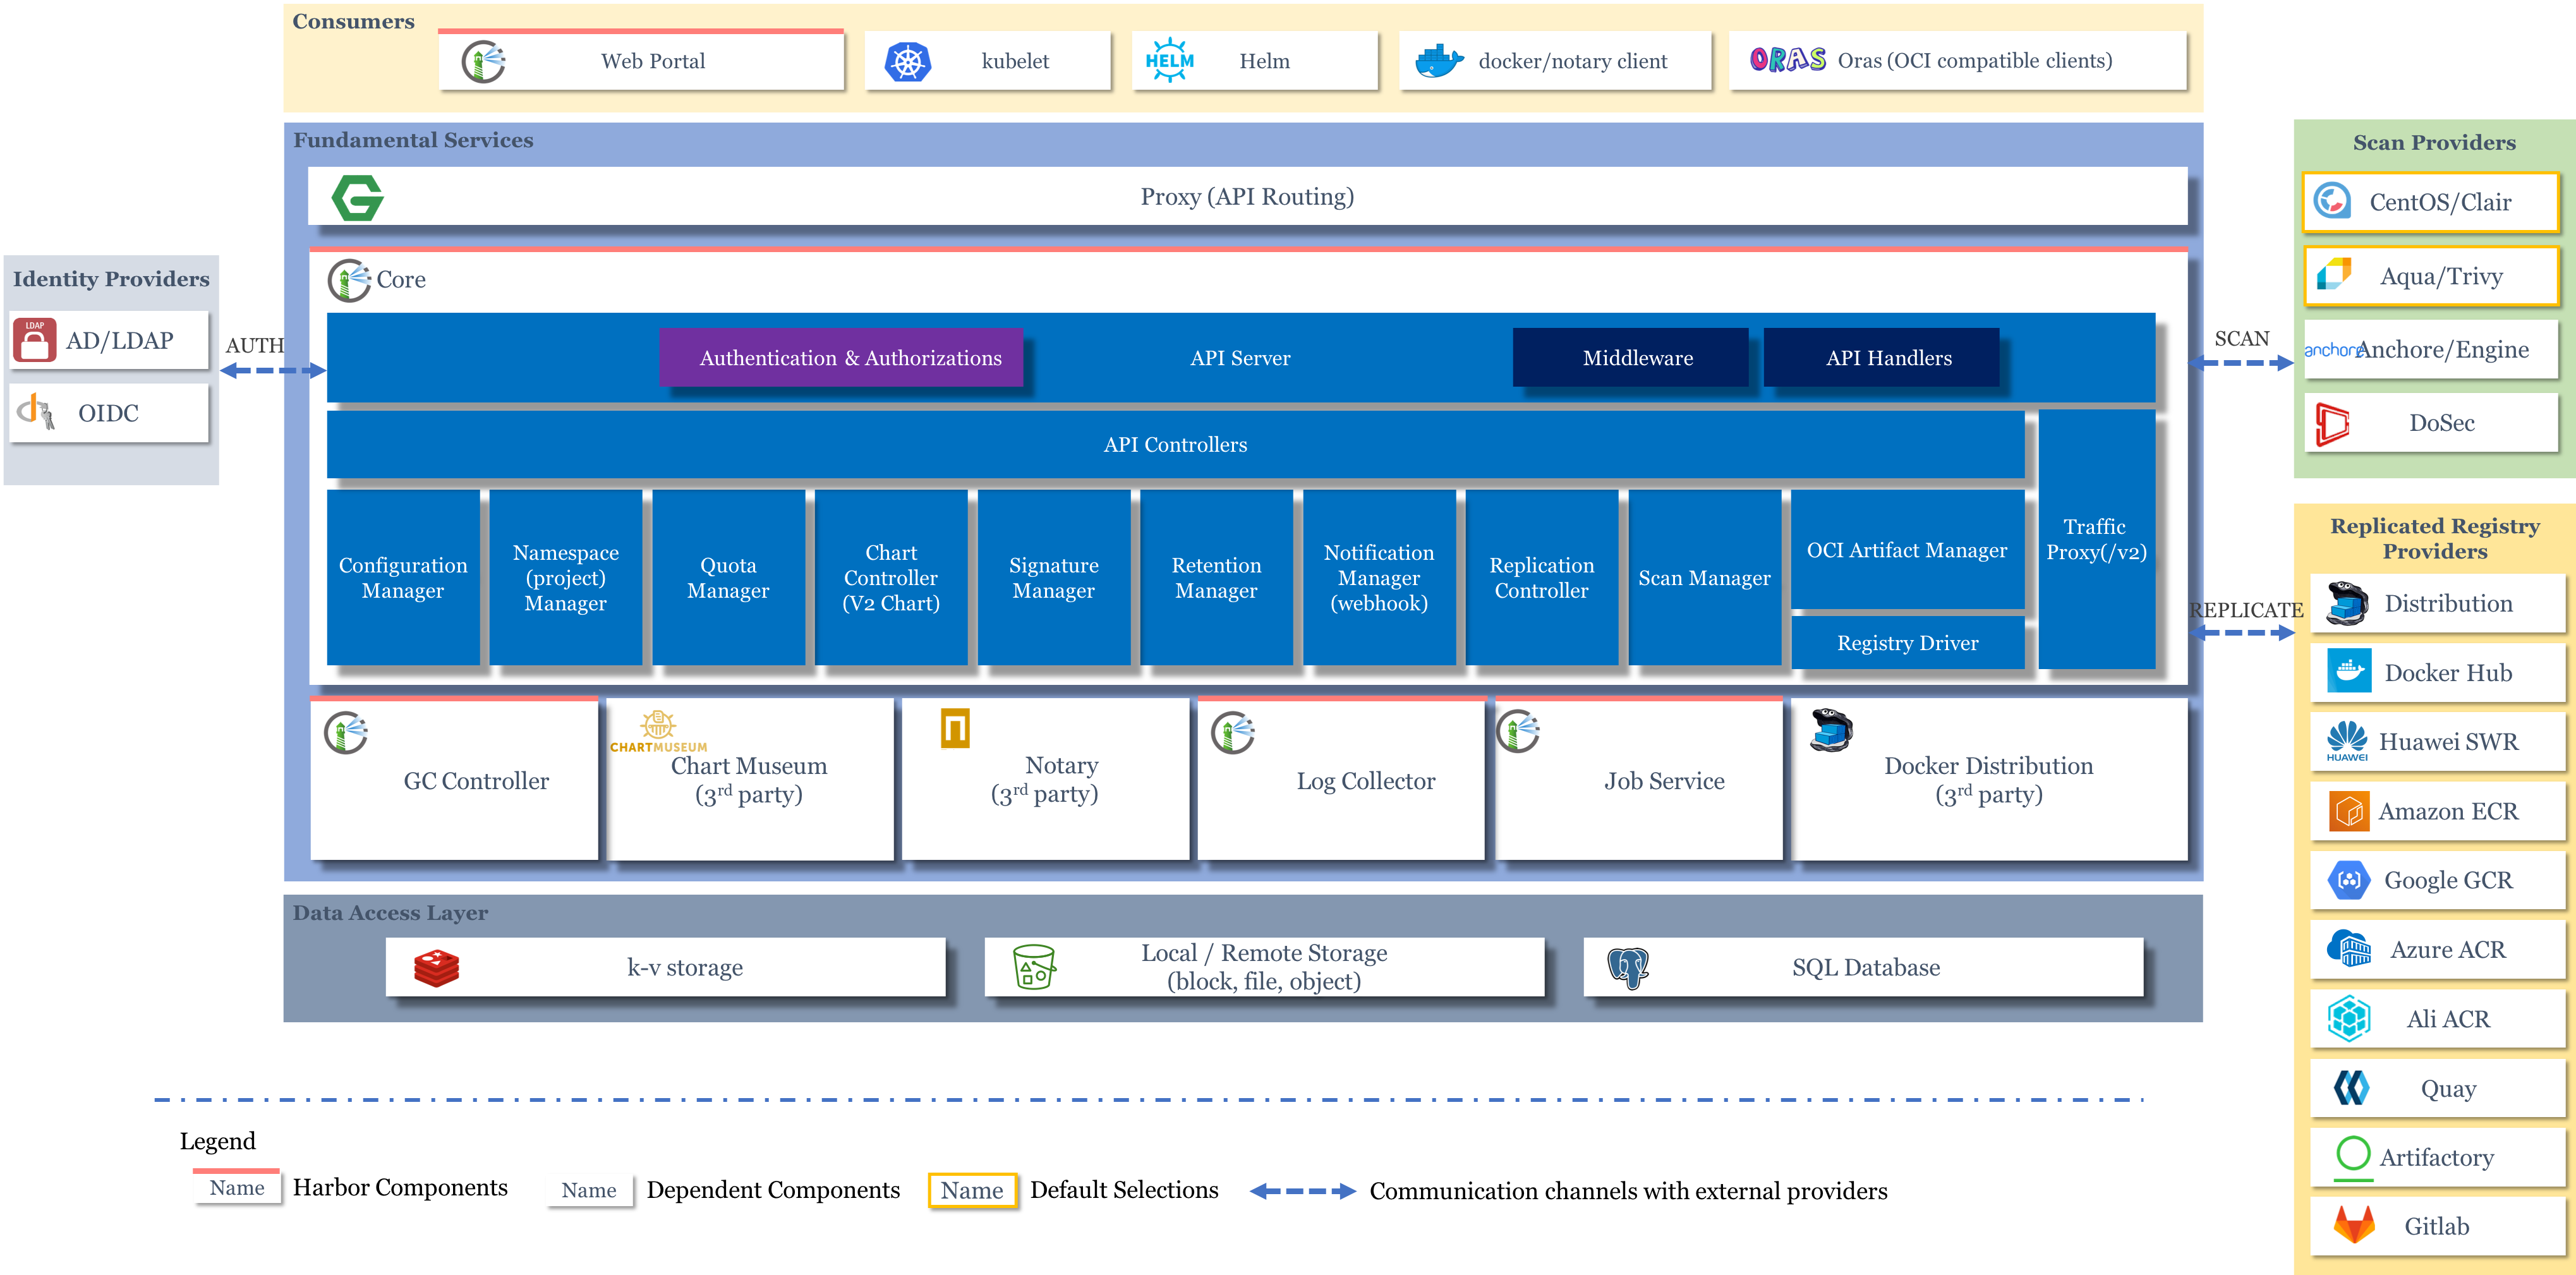
详情见 https://github.com/goharbor/harbor/wiki/Architecture-Overview-of-Harbor
下面就开始来安装使用 harbor 吧!
安装docker
cat << EOF > /etc/yum.repos.d/docker-ce.repo
[docker-ce-stable]
name=Docker CE Stable - \$basearch
baseurl=https://mirrors.aliyun.com/docker-ce/linux/centos/7/\$basearch/stable
enabled=1
gpgcheck=1
gpgkey=https://mirrors.aliyun.com/docker-ce/linux/centos/gpg
EOF

yum install -y docker-ce docker-ce-cli containerd.io bash-completion

cp /usr/share/bash-completion/completions/docker /etc/bash_completion.d/
[ ! -d /etc/docker ] && mkdir /etc/docker
cat << EOF > /etc/docker/daemon.json
{
  "data-root": "/var/lib/docker",
  "log-driver": "json-file",
  "log-opts": {
    "max-size": "200m",
    "max-file": "5"
  },
  "default-ulimits": {
    "nofile": {
      "Name": "nofile",
      "Hard": 655360,
      "Soft": 655360
    },
    "nproc": {
      "Name": "nproc",
      "Hard": 655360,
      "Soft": 655360
    }
  },
  "live-restore": true,
  "oom-score-adjust": -1000,
  "max-concurrent-downloads": 10,
  "max-concurrent-uploads": 10,
  "storage-driver": "overlay2",
  "storage-opts": ["overlay2.override_kernel_check=true"],
  "exec-opts": ["native.cgroupdriver=systemd"],
  "registry-mirrors": [
    "https://yssx4sxy.mirror.aliyuncs.com/",
    "http://hub-mirror.c.163.com/"
  ]
}
EOF

systemctl enable --now docker
安装docker-compose
curl -L https://cdn.jsdelivr.net/gh/docker/compose@1.27.4/contrib/completion/bash/docker-compose  -o /etc/bash_completion.d/docker-compose

curl -L https://github.com/docker/compose/releases/download/1.27.4/docker-compose-`uname -s`-`uname -m` -o /usr/local/bin/docker-compose

chmod +x /usr/local/bin/docker-compose
安装 harbor
下载harbor离线包
wget https://github.com/goharbor/harbor/releases/download/v2.1.1/harbor-offline-installer-v2.1.1.tgz

tar zxf harbor-offline-installer-v2.1.1.tgz
修改 harbor.yml 配置
cd harbor/
cp harbor.yml.tmpl harbor.yml
本次修改了如下内容, 其他的默认就好
hostname: 192-168-77-130.xip.lhjmmc.cn

http:
  port: 80
  relativeurls: true

https:
  port: 443
  certificate: /harbor_data/cert/fullchain.pem
  private_key: /harbor_data/cert/key.pem


external_url: https://192-168-77-130.xip.lhjmmc.cn

harbor_admin_password: 123456

database:
  password: 123456

data_volume: /harbor_data
域名我们使用了
192-168-77-130.xip.lhjmmc.cn的通配符dns形式。使用这个域名,就可以解析到 192.168.77.130,也就是我的主机地址,可以到 https://xip.lhjmmc.cn/ 了解详细信息
下载证书
mkdir -p /harbor_data/cert/
wget https://xip.lhjmmc.cn/fullchain.pem -O /harbor_data/cert/fullchain.pem
wget https://xip.lhjmmc.cn/key.pem -O /harbor_data/cert/key.pem
安装并启动
# ./install.sh --with-notary --with-trivy --with-clair --with-chartmuseum

# docker-compose ps
      Name                     Command                       State                                          Ports
------------------------------------------------------------------------------------------------------------------------------------------------
chartmuseum         ./docker-entrypoint.sh           Up (health: starting)
clair               ./docker-entrypoint.sh           Up (health: starting)
clair-adapter       /home/clair-adapter/entryp ...   Up (health: starting)
harbor-core         /harbor/entrypoint.sh            Up (health: starting)
harbor-db           /docker-entrypoint.sh            Up (health: starting)
harbor-jobservice   /harbor/entrypoint.sh            Up (health: starting)
harbor-log          /bin/sh -c /usr/local/bin/ ...   Up (healthy)            127.0.0.1:1514->10514/tcp
harbor-portal       nginx -g daemon off;             Up (healthy)
nginx               nginx -g daemon off;             Up (health: starting)   0.0.0.0:4443->4443/tcp, 0.0.0.0:80->8080/tcp, 0.0.0.0:443->8443/tcp
notary-server       /bin/sh -c migrate-patch - ...   Up
notary-signer       /bin/sh -c migrate-patch - ...   Up
redis               redis-server /etc/redis.conf     Up (health: starting)
registry            /home/harbor/entrypoint.sh       Up (health: starting)
registryctl         /home/harbor/start.sh            Up (health: starting)
trivy-adapter       /home/scanner/entrypoint.sh      Up (health: starting)
相关目录
- /var/log/harbor/ 日志
- /harbor_data 数据
- /root/harbor 配置目录
其他设置(可选)
github, docker 访问不到问题
在 docker-compose.yml 中 为 harbor-core notary-server clair-adapter trivy-adapter 容器添加外部主机地址
    extra_hosts:
       - "hub.docker.com:3.226.0.168"
       - "auth.docker.io:52.1.121.53"
       - "registry.docker.io:52.4.20.24"
       - "registry-1.docker.io:52.1.121.53"
       - "api.github.com:140.82.112.5"
       - "raw.githubusercontent.com:151.101.248.133"
关闭并重启服务
docker-compose stop
docker-compose up -d
使用 aliyun oss存储
修改 common/config/registry/config.yml 文件
storage:
 cache:
  layerinfo: redis
# filesystem:
#  rootdirectory: /storage
 maintenance:
  uploadpurging:
   enabled: false
 delete:
  enabled: true
 oss:  # aliyun oss
  accesskeyid:  xxx
  accesskeysecret:  xxx
  region: xxx
  internal:  true
  bucket:  xxx
  rootdirectory:  xxx
使用 mirror 模式
修改 common/config/registry/config.yml 文件
proxy:
  remoteurl: https://registry-1.docker.io
注意: 使用代理模式后,就不能docker push 镜像到harbor了。
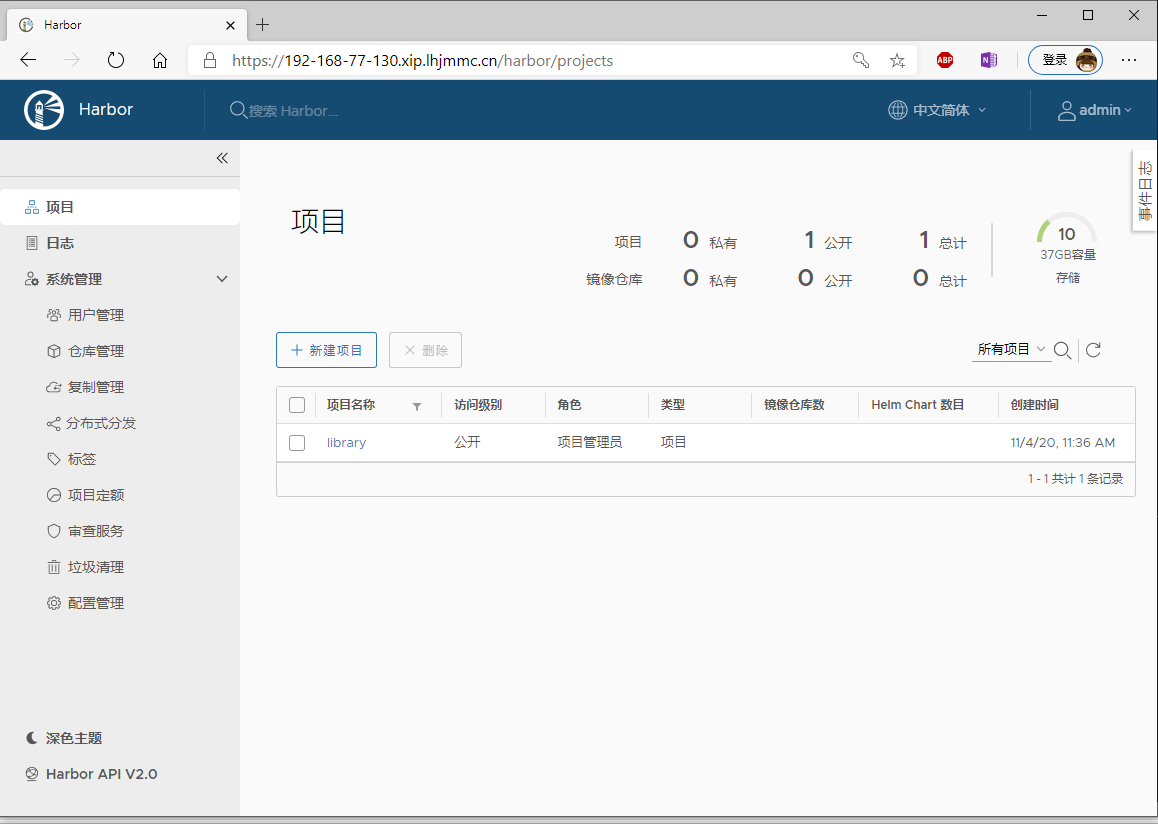
使用harbor
通过 https://192-168-77-130.xip.lhjmmc.cn/ 访问harbor ui
提交镜像
-
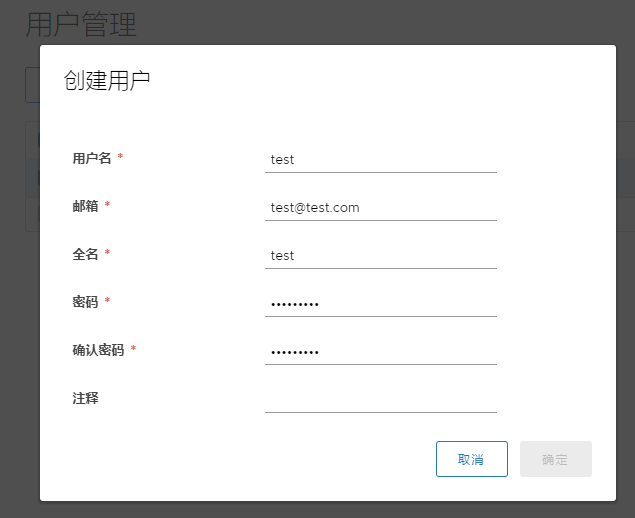
创建
test用户“系统管理” => “用户管理” => “创建用户”
-
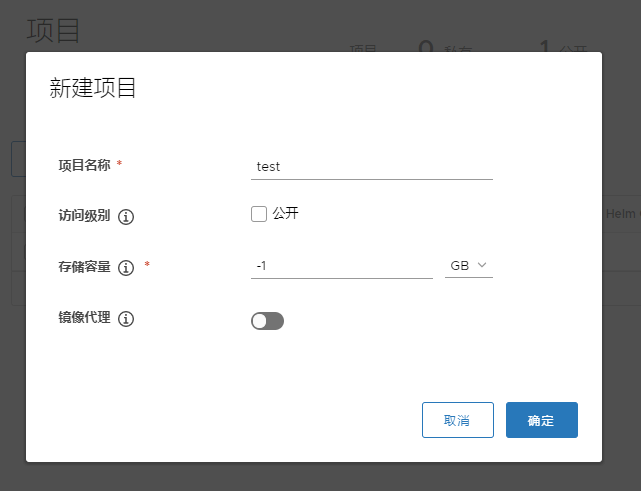
创建
test项目“项目” => “+新建项目”
-
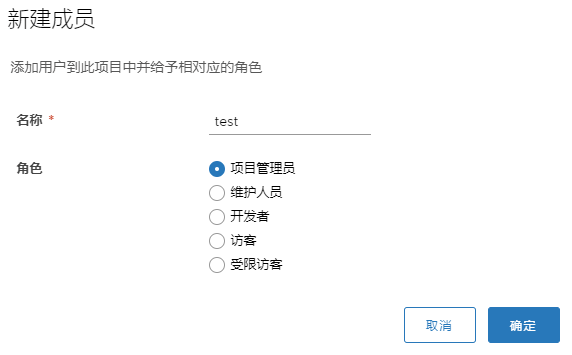
将test用户加入到项目中
“项目” => “test” => “成员” => “+用户”

-
登录hub
docker login 192-168-77-130.xip.lhjmmc.cn -u test --password-stdin <<< "Test1234" -
提交镜像
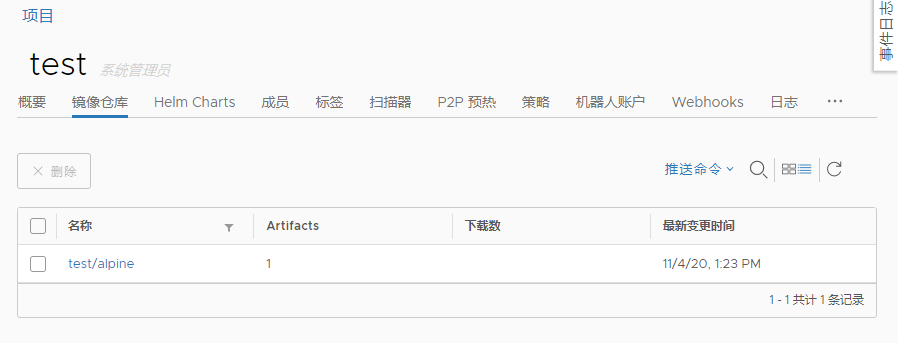
# docker pull alpine Using default tag: latest latest: Pulling from library/alpine 188c0c94c7c5: Pull complete Digest: sha256:c0e9560cda118f9ec63ddefb4a173a2b2a0347082d7dff7dc14272e7841a5b5a Status: Downloaded newer image for alpine:latest docker.io/library/alpine:latest # docker tag alpine 192-168-77-130.xip.lhjmmc.cn/test/alpine # docker push 192-168-77-130.xip.lhjmmc.cn/test/alpine The push refers to repository [192-168-77-130.xip.lhjmmc.cn/test/alpine] ace0eda3e3be: Pushed latest: digest: sha256:d7342993700f8cd7aba8496c2d0e57be0666e80b4c441925fc6f9361fa81d10e size: 528 -
在网页上,我们可以看到上传的镜像 “项目” => “test” => “镜像仓库” => “test/alpine”
内容信任
容器 image 安全的另一个重要方面是验证推送到注册处的 image 是否来自可信来源的能力。Notary提供了使用密钥对 image 进行数字签名的能力,允许企业安全地发布和验证内容。
拉取待签名的镜像
docker pull busybox
使用内容信任和指定notary server
export DOCKER_CONTENT_TRUST=1
export DOCKER_CONTENT_TRUST_SERVER=https://192-168-77-130.xip.lhjmmc.cn:4443
如果您使用的是自签名证书,请确保将CA根证书复制到 /etc/docker/certs.d/
/ 和 ~/.docker/tls/ :4443/
# docker tag busybox 192-168-77-130.xip.lhjmmc.cn/test/busybox
# docker push 192-168-77-130.xip.lhjmmc.cn/test/busybox:latest
The push refers to repository [192-168-77-130.xip.lhjmmc.cn/test/busybox]
d2421964bad1: Layer already exists
latest: digest: sha256:c9249fdf56138f0d929e2080ae98ee9cb2946f71498fc1484288e6a935b5e5bc size: 527
Signing and pushing trust metadata
You are about to create a new root signing key passphrase. This passphrase
will be used to protect the most sensitive key in your signing system. Please
choose a long, complex passphrase and be careful to keep the password and the
key file itself secure and backed up. It is highly recommended that you use a
password manager to generate the passphrase and keep it safe. There will be no
way to recover this key. You can find the key in your config directory.
Enter passphrase for new root key with ID 28504a5:
Repeat passphrase for new root key with ID 28504a5:
Enter passphrase for new repository key with ID 79670f6:
Repeat passphrase for new repository key with ID 79670f6:
Finished initializing "192-168-77-130.xip.lhjmmc.cn/test/busybox"
Successfully signed 192-168-77-130.xip.lhjmmc.cn/test/busybox:latest
第一次签名的image推送会初始化TUF。文件在~/.docker/trust/中。
# find ~/.docker/trust/ | head
/root/.docker/trust/
/root/.docker/trust/tuf
/root/.docker/trust/tuf/docker.io
/root/.docker/trust/tuf/docker.io/library
/root/.docker/trust/tuf/docker.io/library/busybox
/root/.docker/trust/tuf/docker.io/library/busybox/metadata
/root/.docker/trust/tuf/docker.io/library/busybox/changelist
/root/.docker/trust/tuf/192-168-77-130.xip.lhjmmc.cn
/root/.docker/trust/tuf/192-168-77-130.xip.lhjmmc.cn/test
/root/.docker/trust/tuf/192-168-77-130.xip.lhjmmc.cn/test/busybox
使用Notary CLI,我们可以看到该image已注册。
# wget https://github.com/theupdateframework/notary/releases/download/v0.6.1/notary-Linux-amd64 -O /usr/local/sbin/notary
# chmod +x /usr/local/sbin/notary
# alias notary="notary -s https://192-168-77-130.xip.lhjmmc.cn:4443 -d ~/.docker/trust"
# notary list 192-168-77-130.xip.lhjmmc.cn/test/busybox
Enter username: test
Enter password:
NAME      DIGEST                                                              SIZE (BYTES)    ROLE
----      ------                                                              ------------    ----
latest    c9249fdf56138f0d929e2080ae98ee9cb2946f71498fc1484288e6a935b5e5bc    527             targets
在Harbor GUI中,图像显示为已签名。

可以在项目中,开启内容信任,阻止未签名的镜像下载。

代理Docker hub
代理仓库是不能 push 镜像的。push操作会被拒绝。
-
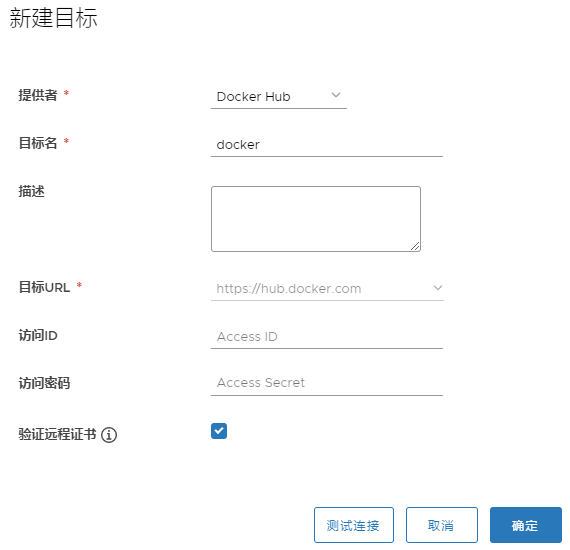
创建仓库目标
“系统管理” => “仓库管理” => “新建目标”
-
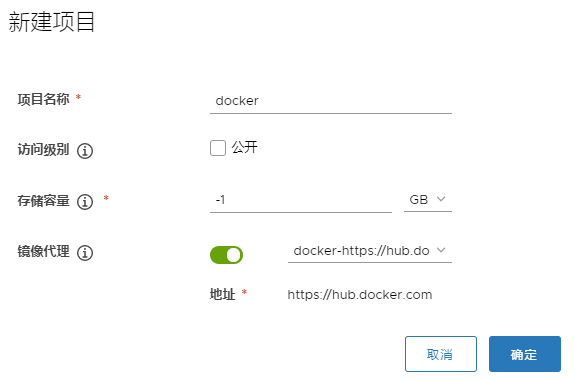
新建docker项目
“项目” => “+新建项目”
-
将test用户加入docker项目中
“项目” => “docker” => “成员” => “+用户”
-
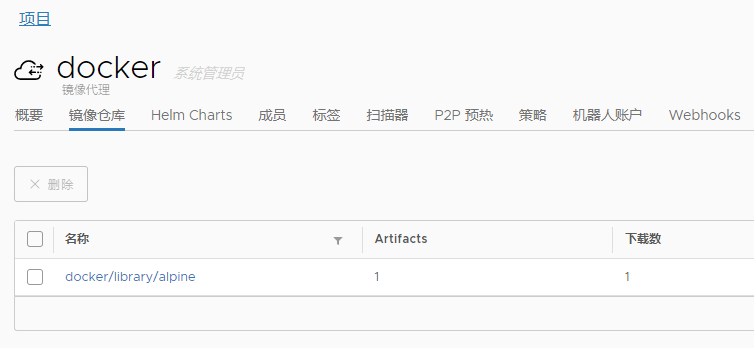
拉取docker hub中镜像
docker pull 192-168-77-130.xip.lhjmmc.cn/docker/library/alpine拉取完成后,需要过一会,harbor上才显示这个镜像。
“项目” => “docker” => “镜像仓库” => “docker/library/alpine”
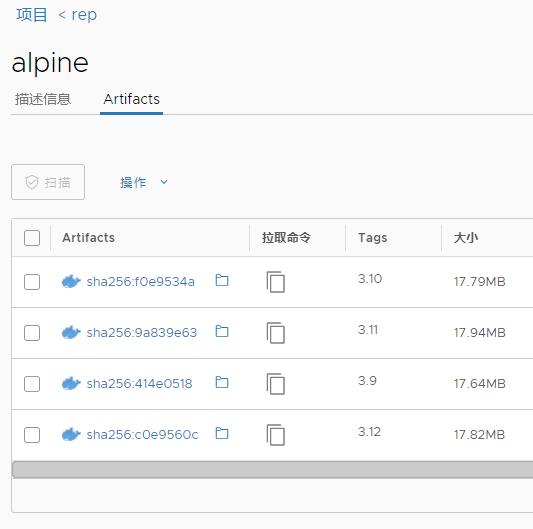
复制镜像
我们需要实现手动的从docker hub 中复制 alpine的 3.9, 3.10, 3.11, 3.12版本镜像到 rep 项目中。
-
新建仓库目标
“系统管理” => “仓库管理” => “新建目标”
-
新建alpine-rep规则
“系统管理” => “复制管理” => “新建规则”
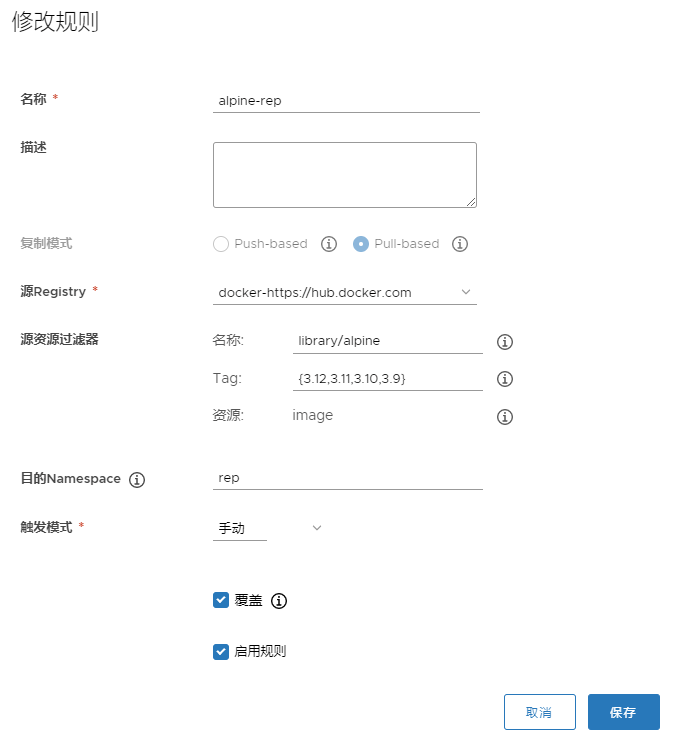
复制规则介绍见 https://goharbor.io/docs/2.1.0/administration/configuring-replication/create-replication-rules/
-
开启复制任务
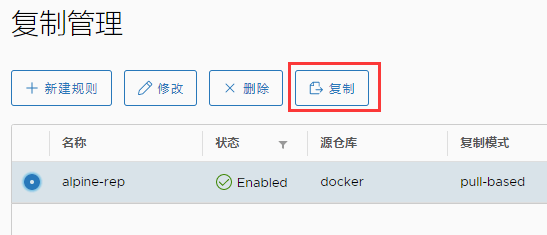
复制完成后,可以点击任务,查看任务详情。

再去rep项目中,就可以看到复制过来的镜像了。
漏洞扫描
在项目中,选择镜像的tag,点击”扫描”
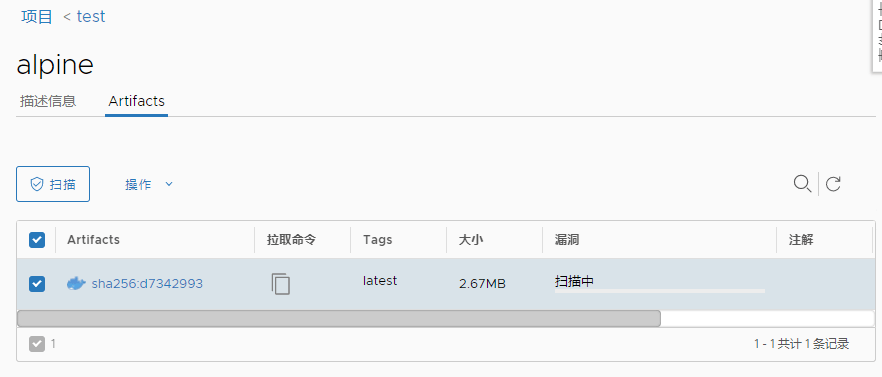
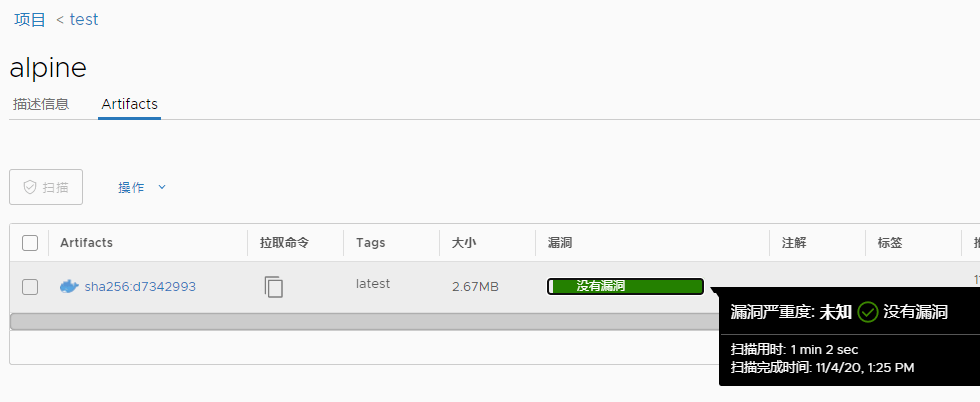
扫描完成后,就可以查看扫描结果
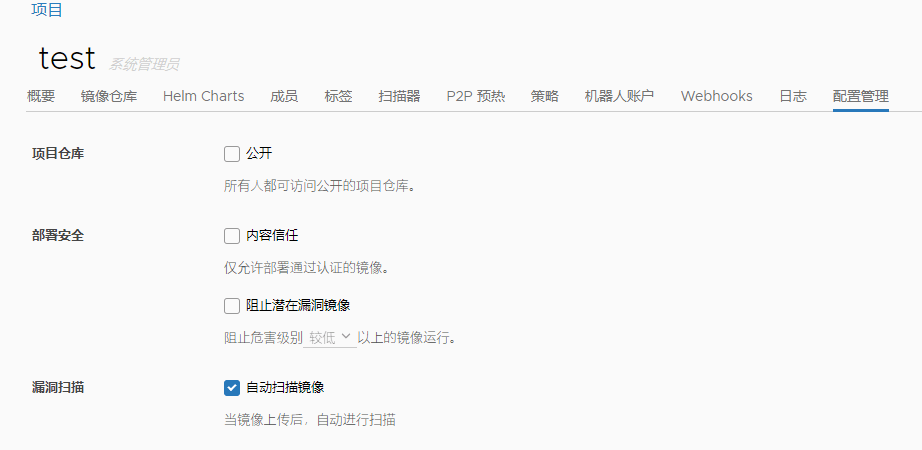
在项目中可以设置上传时,自动扫描
helm 上传
-
安装helm
curl https://cdn.jsdelivr.net/gh/helm/helm@master/scripts/get-helm-3 | bash -
添加harbor的test仓库
# helm repo add test https://192-168-77-130.xip.lhjmmc.cn/chartrepo/test --username test --password Test1234 # helm repo list NAME URL test https://192-168-77-130.xip.lhjmmc.cn/chartrepo/test -
安装push插件
helm plugin install https://github.com/chartmuseum/helm-push -
创建helm项目
helm create test-workflow -
上传chart
helm push --username test --password Test1234 ./test-workflow test -
更新repo索引查找上传的项目
 # helm repo update

 # helm search repo test
 NAME                    CHART VERSION   APP VERSION     DESCRIPTION
 test/test-workflow      0.1.0           1.16.0          A Helm chart for Kubernetes
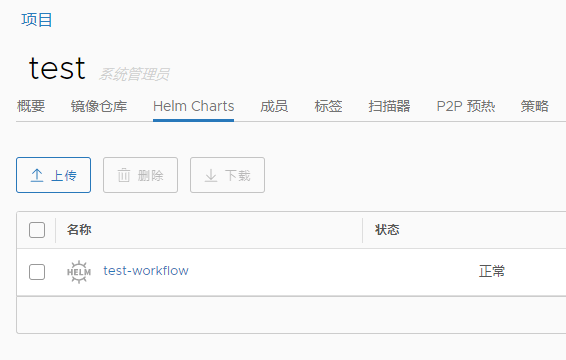
在harbor gui中就能看到helm chart了
“项目” => “test” => “Helm Charts”